
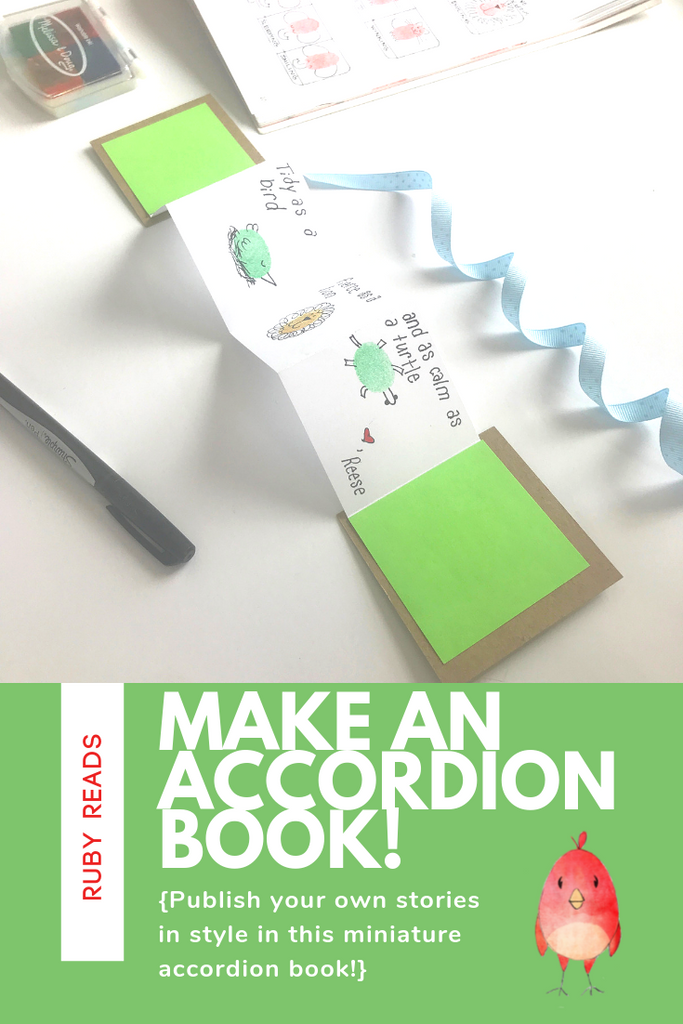
I made a teeny-tiny accordion book for each of my kiddos for Valentine's Day this year, and it was so much fun! I love that a little book has a bit more permanence then a card, and each of my kids has their book hidden in a special place in their room.
Although you can make accordion books in any size you want, I specifically designed this one to cut efficiently out of 8-1/2 x 11 cardstock. There are so many variations you can make using this as a template, but here's the basic idea. Have fun making these with and for the kiddos you love!
How to make a teeny-tiny accordion book:

Supplies:
White cardstock, cut in a 2 1/2 by 11 inch strip
Two 2-1/2 inch squares of plain or patterned colorful cardstock
Two 3 inch squares of chipboard or other thin cardboard for covers
One piece of ribbon or cord, approximately 15 inches long
Glue or gluestick
1) Use a bone folder and ruler (or other tool of your choice) to score the white strip of paper 5 times. Here’s how:
- On one side, score once in the exact middle (5-1/2 inches from each short end), and then 2 more times, 1/2 inch from each end.
- Flip the strip of white paper over, and score two more times, 3 inches from each short end.
 Once you’re done, flip your paper back over and fold it on the lines you just scored. It should look like a capital "M" as in the photo. The short ends flip up and are the tabs you’re going to glue to the covers.
Another check: Once you’ve made all the folds, you should be able to fold the entire strip so you have a square. If it all the edges don’t quiiiiite square up, take a moment now and monkey with the folds a little so that they do. You now have four square pages in your strip with one short tab at each end.
2) Glue your endpapers to the upper side of each of the tabs. To do this, apply glue to the upper side of tab and place the end paper on the glue tab.


After you’ve done this, the tab should not be visible from the upper side of the paper. Now you have, left-to-right, endpaper, then 4 white book page squares, then end paper square. And you can still fold the whole thing up into a square, with endpapers on the top and bottom. When you do, you’ll now see the tabs on the top and bottom of the stack. Good? Yay! No? Adjust it now before the glue dries!
3) Apply glue to the bottom of the last endpaper (on the bottom of your stack), including the tab. Now center the stack (or just the last endpaper if you’ve unfolded it) over one of the cover squares, and press firmly to adhere. You should have a 1/4-inch border of cover showing around the entire endpaper.


4) Fold the stack back up so you have a square with an endpaper on top and cover on bottom, and apply glue to the top endpaper (and tab). Aligning the top and bottom covers, stack the final cover piece on top of the entire assembly and press to adhere the cover to the endpaper.
 You’ve done it! Have so much fun writing and illustrating your teeny-tiny accordion book!
 And, when you’re done, tie it closed with the ribbon and give it to someone special. OR keep it as your own special treasure….you can easily make more!
When you make your accordion book, snap a pic Be sure to tag us on Instagram @rubyreadsbooks ! We can't wait to see what you make!
Leave a comment: